|
IMPORTANT
|
|
When installing the Barcode Printing Kit-F1
This printer has PS ROM installed at the factory. If you want to install the optional Barcode Printing Kit-F1, first remove the PS ROM module by following the procedure in "Removing ROM."
|
|
NOTE
|
|
A Phillips screwdriver is required.
Have a screwdriver ready that matches the size of the screws for the slot cover.
|
1
Turn the printer OFF, then disconnect the cables or cords from the printer.
 |
Shut down the printer before turning it OFF.
For details on the procedure for shutting down the printer, see "Turning the Printer ON/OFF." |

<How to disconnect the cable or cord>
|
USB cable*
|
(2) Turn the computer OFF.
(3) Disconnect the cable from the printer.
|
|
LAN cable*
|
(4) Disconnect the cable from the printer.
|
|
Power cord
|
(5) Disconnect the power plug from the AC power outlet.
(6) Disconnect the cord from the printer.
|
|
*
|
Whether the cable is connected or not varies depending on your environment.
|
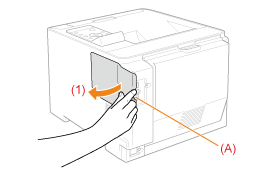
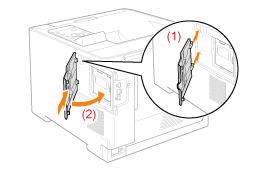
2
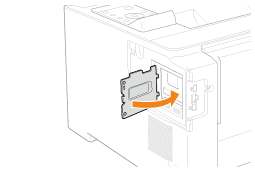
Remove the right cover.
|
(1)
|
While holding the tab (A), open the cover a little.
|
|
|
 |
|
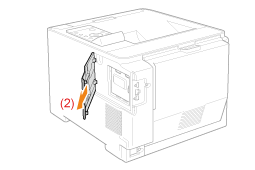
(2)
|
Remove the cover in the direction of the arrow.
|
|
|
 |
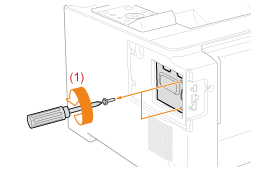
3
Open the slot cover.
|
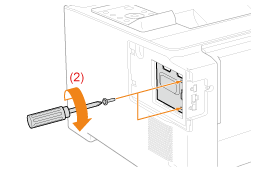
(1)
|
Remove the two screws.
|
|
|
  |
|
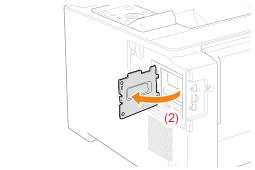
(2)
|
Open the slot cover.
|
|
NOTE
|
|
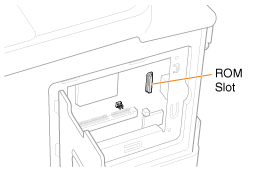
About the locations for installing ROM
Confirm the installation locations and their orientations before installing the ROM modules.
 |
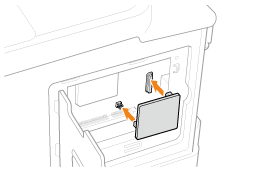
4
Install ROM.
Push the ROM module in the printer firmly while aligning the module with the two connectors.
5
Close the slot cover.
|
(1)
|
Close the cover.
|
|
|
 |
|
(2)
|
Attach and fasten the two screws.
|
|
|
 |
6
Attach the right cover.
|
(1)
|
Attach the right cover.
|
|
(2)
|
Close the cover.
|
|
|
 |
|
Next, perform the following procedures.
|